
DIY this Car Seat Poncho for $10!
Hey Friends! BRRRR! Cold weather almost always hits *hard* in the north. One day it can be moderate and actually feel like fall, then *bam* it is winter for about six months. At least that seems to be the case. After living in the same climate for my entire life, I still can’t get acclimated. Now that I have babies that inherited our impending climate, I started to look for warm outerwear that does not compromise the strappy carseats. I came up short for years until I came across a cool idea browsing Pinterest! The car seat poncho! What a great idea! The kids can stay warm, and they can be securely strapped in their seats. Win win! As I was browsing, I couldn’t find a step-by-step instructional that was simple for me to follow.
Since I’m self taught and only know a couple of sewing stitches, I wanted to make a carseat poncho that is sturdy, looks professional, and serves its full purpose. I put all of the Pinterest post ideas together and came up with my own rendition of the carseat poncho, the reversible hooded cape. You can definitely make one with a few simple materials in an hour and a half!
(SIDE NOTE: You can definitely use the same idea to make one adult sized! It’d be perfect for outdoor sports games, camping, and more!)
This post may contain affiliate links. Click here for details.
Here’s what you’ll need to make a car seat poncho:
2 fleece blankets like this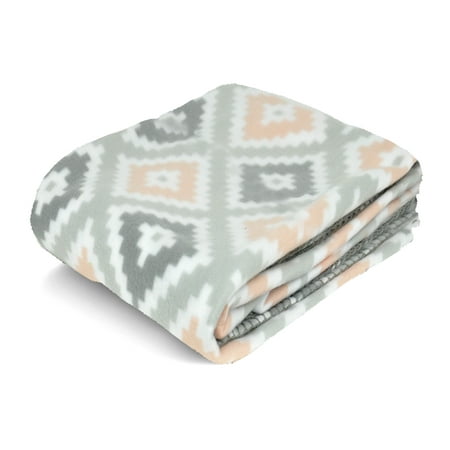
Sewing notions (pins, scissors/rotary cutter ,etc…)
Sewing machine (here’s the one I have, but you can find one as low as $99)
[my total cost for this project was the “fabric” which I purchased for $5, $2.50 for each pattern. You can get a nice blizzard fleece from JoAnn for about $5 per yard (you would need at least two yards to make one poncho for a toddler), which is double the price but you get a wider variety of colors and patterns to choose from.]
An old hooded jacket or sweater that fits (to use as a template for the hood)
YOU MAY ALSO LIKE: MAKE YOUR OWN GLITTER SHOES
If you’re familiar with making a circle skirt, you’re in luck. It’s the same exact instruction for making the cape section of the poncho. Fold your fabrics (separately) first the long way (hotdog) then in half again (hamburger). You should be left with a square with one exposed edge and the other closed. Lay one fabric on top of the other and line them up as evenly as possible to get accurate cuts through both fabrics.


(quick side note: I purchased this rotary cutter and I absolutely love it! It’s very sharp, exceeded my expectations, and is perfect for precision cutting! Make sure you have a cutting mat in your work space or a board underneath before you cut because it will leave deep marks otherwise! You wouldn’t want to mess up your floor or counter.)
Before you can cut, you have to measure the hole for the neck and the length of the cape. I used an old sweater to get as close of a measurement as I could. The neck hole came out larger than I expected, but went with what I had. For the length, I measured from the nape of my baby’s neck to the middle of her back and added two inches for slack. Using the measuring tape, I marked the inches all the way from one closed seam to the other, making what looked like a 1/4 pie chart shape. Then, I cut along the line, keeping my blade as straight as possible.


There you have it! Your carseat poncho is halfway done!
When you open both of your fabric pieces, you should have two circles, one of each pattern of your choice. If you don’t want a hood, you can pin and begin sewing with the right sides together, starting with the bottom of the cape. Once you’ve sewn the bottom, flip the fabric inside out. Pin the neck hole by folding the two pieces inside to give it a hemmed finish & sew. That’s it! You’re all done! You can flip your cape inside out for multi-use. Accompany it with a hoodie underneath to still get the hooded look and feel.
If you *do* want a hood, keep reading! Here comes the fun part!
I used my baby’s winter coat to “trace” a pattern for the hood. It took two attempts to configure the perfect pattern for the poncho with the hood of her winter coat (*I had a duh moment*). Using the fabric that is still folded, simply trace the outside of the hood and cut it. I ended up with 8 hood pieces, but you only need 4…two of one fabric and two of the other.


Start by pinning the matching hood pieces right sides together and sewing one seam along the back of the hood. Then do the same for the other two pieces. You should have the makings of two hoods, technically. (*if you’re a visual learner, see the photos below*) Pin the right sides together (I know it seems like a lot of pinning, sewing, and re-pinning, but the pieces are small and easy to work with. I like to do all of my pinning proactively to be more productive.) Sew along the outside then flip inside out. You should now have *one* [colorful, if you choose] piece that may look like a giant oblong hat. If you tuck one side into the other, you will see the reversible hood formed. Find the middle of the hood (the crown point), and sew a single stitch a few times to secure the hood in place. *Almost done!*


Hem the hood to give it a finished and professional look, then pin the neck hole with the hood in between the two circle pieces. Sew a hem along the entire neck hole and that’s it! You’re done! I went for an inverted look for this tutorial, but you can place your hood however you’d like.


This is how mine looks after sewing the hood to the neck hole:


Lastly, sew a stitch across the bottom of the poncho to give it the final finished look.


Now you can strap your baby in comfortably without compromising her safety in her carseat! She will stay warm if the car is cold and most importantly, she will be safe! Please make sure to send photos of your carseat ponchos if you’ve tried to make one!


If you’d like a car seat poncho made to order, contact me!